


Coloring your hair? No problem! Coloring your brows…? Now that’s a different story!
Whether you’ve attempted brow coloring before and failed or won’t even think about trying it before doing some extensive research first, this is the blog for you!
Below, HerStyler will be going over everything you need to know about coloring your brows; which types of dyes are best to use, how to get the best results, and how to keep yourself (your eyes) safe whilst you do. We’ll even go over makeup tips to change your eyebrows color if you prefer something less permanent!
How To Color Eyebrows With Makeup
If the idea of permanently colored brows just doesn’t speak to you, the ingredients don’t agree with your skin, or you simply want to see how you’ll look with darker, filled-in brows, choosing an eyebrows color/ product from within your makeup bag is always a great first step.
Not only does it look just as good as tinted brows (even though it doesn’t last as long), it’s also great if you like the au natural look for summer or want the option of thicker more defined brows for fall and winter.
So, what’s the best technique? How to color eyebrows just with a few simple tools?
Keep scrolling and we’ll reveal all of our top tips, followed by a handy step-by-step guide!
Invest in an Angular Brush

Whether you end up choosing a powder, a pen, or a pencil to fill in your brows, we definitely suggest you invest in an angular brush!
Why?
If you go the brow powder route, you’ll quickly find it’s the most valuable brush in your set! If you opt instead for a pen or pencil to get the job done, this brush will be the perfect tool to apply concealer to your brow bone. This will elevate and define the shape on your brow.
Don’t Be Afraid To Try Different Products
What works perfectly for some can be useless for others. Everyone’s brows are different. Therefore, we all gravitate towards different products when it comes to our eyebrows color.
Brow Pens
For those switching up their look with a super dark, defined-looking brow with staying power, we recommend opting for an eyebrow pen. These products look a little like a felt tip. And, trust us, they’re just as easy to use! They’re also great for building up particularly gappy, sporadic brows. They can even mimic the effect of microblading.
Brow Pencils

If you’re hoping for wispier, more ‘classic’ looking brows, we suggest brow pencils all the way! As they’ve been around for so long, brow pencils come in pretty much every shade under the sun. This means you’ll always be able to find the exact right shade for you and your natural brow color.
Additionally, most of the brow pencils on the market are waterproof these days. So, you can be confident your look will stay put from day to night. Brow pencils are also ideal for beginners. This is because you don’t need to be too precise when applying. If you make a small mistake, the formula is pretty easy to smudge and correct unlike the results of a brow pen.
Brow Powder
If pens aren’t your thing and you prefer the control of powder and a brush, we get you! There are plenty of stay-put brow powders on the market these days, perfect for adding fullness, dimension, and a deeper color tone.
Embrace Your Brow’s Different Shapes
Forgetting about your natural eyebrows color for a moment, let’s talk about their natural shape. In our experience, nobody out there is born with a perfectly symmetrical set of brows, and you know what, that’s a good thing! Brows that are made to look identical to one another will look obviously made up and often fail to compliment the natural shape of your face and eyes.
After all, we want them to naturally frame those beautiful peepers of your so drastically altering them to look exactly alike won’t do that. Instead, embrace the natural curvature of each brow, even them out a little by all means, but don’t get caught up trying to make them look exactly the same. They’re sisters, not twins!
How to Alter Your Eyebrows Color With Makeup:

Step One
Make sure your brows are squeaky clean. Moisturizers, daily grime, dead skin, or makeup build-up from the day before can prevent your makeup coverage from looking even and fresh. So, gently cleanse your brows before you begin to make sure you get the best finish.
Step Two
With your brows clean and dry, go ahead and run a clean dry spoolie brush gently through the hairs to wake them up and release any small tangles or overlaps. Comb your brows upwards and out into the desired shape you want to create as you go. This will form the base for where you apply your makeup.
Step Three
For a pen, pencil, or angled brush application, hold the product close to the top with the tip facing downwards. This will give you greater control as you start to apply strokes to your brows. Additionally, make sure you hold the tip angled to the same degree your brow hairs instinctively grow for a natural look.
Step Four
Starting just two or three hairs in from the edge of your brow (the edge closest to your nose), begin making light brush strokes with the very tip of your pen/pencil, or tip of your angled brush. This will mimic the way your hairs actually grow adding a thicker appearance and a darker color.
Be sure not to make these strokes too close together or you’ll end up with all makeup and no brow visible. It’s better to start with just a few strokes then go back in later to add more if you need them.
Step Five
Once you reach the point in your brow where it starts to thin out and curve round/down, make your strokes shorter and even more sporadic. Our brows tend to thin out towards the ends and whilst we want to create the illusion of a thicker brow overall, having the same density all the way along will make your brows look obviously ‘drawn in’ and not like a natural brow.
Step Six
If you prefer to let your brows alone at this point you absolutely can! Just bear in mind that without setting them in some way you may find they don’t last as long. If you’d like to set them in place, there are a couple of things you can do.
Firstly, you can invest in a product specifically designed to set brow makeup. These can be on the pricey side but they do tend to work wonders and keep your makeup look intact from morning until night. Alternatively, something we’ve found that’s a little more inexpensive yet seems to do a pretty much identical job is a quick sweep of clear mascara. Choose one that’s made for conditioning the lashes as these formulas tend to be lighter and won’t give your brows a ‘crunchy’ feeling once they’re totally dry.
How To Color Eyebrows With a Dye or Tint

When it comes to eyebrows color more permanently, there are a few different ways you can go. Firstly, we’d say if you’re not confident in your abilities to dye your own brows at home, there’s really no shame in booking in with a professional you know will get it totally right!
If however, you want to give it a go yourself, we’re sure you’ll do an excellent job! Especially if you follow along with our step-by-step guide to semi-permanent brow dye at home…
Step One: Choose Your Dye
When selecting which tint or dye you’ll use to enhance your eyebrows color, make sure to avoid permanent dyes designed for the hair. These dyes are not formulated to color eyebrow hairs, and most importantly, getting them this close to your eyes is a bad idea! They can cause significant damage to your eyes and delicate eye area if you accidentally get some in there.
Instead, choose dyes specially designed for eyebrow tinting, henna dyes, and, in a pinch, semi-permanent hair dyes. These will absolutely get the job done. will last for ages, and are much safer to use near your eyes and face!
Step Two: Choose Your Shade
Once you know which type of dye you’ll be using, it’s time to consider the shade before you make your purchase. Those wanting to make a noticeable change to their eyebrows color and perceived thickness should opt for just one shade darker than their natural eyebrows color. This will make your brows look more noticeable and a little more dramatic without going overboard. Also, if you go too dark, it’ll be pretty obvious as your brow hairs grow through later!
Meanwhile, if you simply want to fill in what you already have whilst keeping a light and natural look, opt for a shade close to your natural eyebrows color.
Want a pro tip?
It’s a pretty simple yet effective one…
If there’s only the option to go slightly lighter or slightly darker, opt for darker. Though it may be a little heavier at first, you’ll definitely be able to notice a difference that you wouldn’t with a lighter tint. What’s more, the color will fade over time and provide an exact color match.

Step Three: Always Do a Patch Test!
At least 24 hours before you’re going to dye your brows, take a very small amount of the dye/tint you’ll be using, and apply it onto your skin. Behind the ear or on the inside of your elbow is a good place. The skin in these areas is pretty delicate so it’ll be a good indicator of whether or not the delicate skin beneath your eyebrows can take the dye without reacting at all.
As long as you leave it a full 24 hours and your skin does not react whatsoever, you’re all good to proceed!
Step Four: Prepare The Skin Around Your Brows
Before you go in with the dye itself, be sure to prepare the area around your brows so you don’t accidentally tint your skin in the process! A light layer of petroleum jelly or a heavy moisturizer should do the trick. Just be sure not to get it in the brows themselves.
Step Five: Prepare Your Dye Right Before You’re Going To Use It
If your chosen brow tint requires mixing two ingredients, you should wait until you’re completely ready to brush it onto your brows before you do that. If you leave the dye already mixed for too long it’ll continue to develop and darken and can even start to dry out.
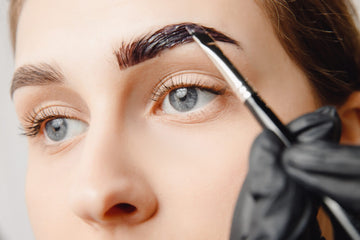
Step Six: Apply the Dye

Now the bit we’ve all been waiting for…
…actually dyeing your brows!
It’s up to you whether you opt to use the applicator your kit comes with. If you feel it’s the wrong shape for your brows or you find it tricky to handle, you can always use a clean cotton swab or a clean spoolie brush instead.
As you apply the dye, simply brush it on in gentle strokes making sure only to cover the brow hairs and not your skin or you can easily end up dying the fine facial hairs we all have around our brows.
Make sure the hairs are thoroughly coated so it takes evenly to each hair. Also, it won’t get darker the more you use, it’s the time you leave it on for which will make a difference to the depth of color so don’t be afraid when it starts to develop, it’s perfectly natural to resemble a ventriloquist doll at this stage!
Step Seven: Set Your Stop Watch
Once you’ve applied your dye evenly to both brows, set your stopwatch (phone alarm) for the correct amount of time specified on your chosen dye kit. Don’t be tempted to leave it for longer as you can always repeat the process but you can’t un-dye your brows!
Step Eight: Remove the Dye & Enjoy Your New Look!
When the timer’s up, go ahead and thoroughly clean away your dye with a cleansing pad (or several) and a generous amount of micellar water. This will be gentle enough not to interfere with the dye but will clean it all away without leaving any there to keep developing.
Clean your brows until the pad is completely clear, then you can always use a mild facial cleanser after to get ensure all traces of dye are removed. (Don’t be tempted to go straight in with a facial cleanser as the dye will most certainly end up in your eyes!)
Once the dye has all been washed away, go ahead and marvel at your new, defined, more dramatic brows. Just a simple comb out with a clean spoolie brush and you won’t believe how much fuller and more impressive they look!


