

As much as we love curling irons and wands, there’s just something so convenient about using a straightener as a hair curler.
For starters, any time we can combine all of our hair styling needs into one heat tool, it’s a good day. Secondly, the curls you can create with a straightener are so quick and look so effortlessly cool and beachy, we sometimes prefer this style to the more polished results we get with a traditional hair curler.
Seeing as you’re here, we’re betting you feel the same but aren’t exactly sure how to achieve the right technique for the look you want. Don’t worry, Herstyler has your back. Let us share our top tips and tricks to teach you exactly how to use your straightener as a hair curler!
Why Choose Straightener Curls Over Hair Curler Curls

Don’t get us wrong!
We’re certainly not here to dismiss curling wands or curling irons. In fact, you’ll find many professional-quality hair curlers on the Herstyler online shop.
We love the more polished, and often glamorous look we’re able to achieve with these dedicated hair curler tools, especially for special events or work commitments.
However, when it comes to creating curls daily, we find it’s sometimes much quicker with a straightener, and yet, the curls still last all day!
We also love the fact that no section of hair is subjected to intense heat for a long amount of time.
Once you’ve wrapped the piece of hair you’re curling around your straightener, it only takes a few seconds to pull the hair through and produce a curl.
Meanwhile, we’ve found that with curling wands and irons, you’ll usually need to hold the whole section of hair in place for around 8-10 seconds (and no longer or it’ll damage your hair!).
Which Straighteners Work Best as a Hair Curler?
Honestly, with the right technique, the majority of straighteners will work to curl your hair. That said, it doesn’t mean they’ll always be the best or the easiest.
We can help!
Those with a straight outer edge are likely to give you heat creases as the hair doesn’t move around them as easily.
Meanwhile, straighteners with a wide plate can be a little trickier to turn in your hand and may take a little more practice. That said, if you want slightly looser straightener curls, this might be a good option for you!
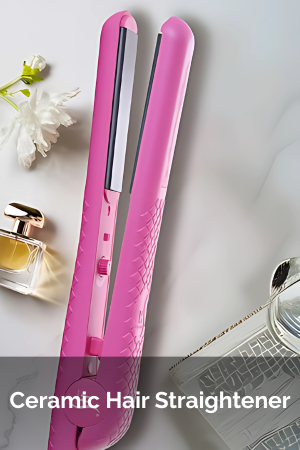
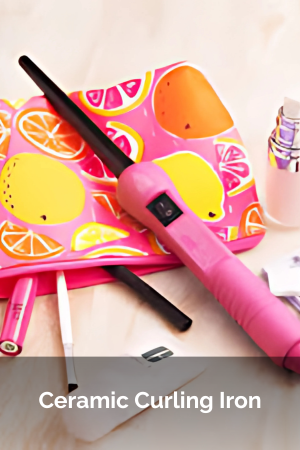
With all of this in mind, we highly recommend opting for straighteners with a rounded edge like the versatile Herstyler Straight N’ Style straightener.

This amazing heat tool produces the most incredible straight hair results, but it’s also designed to create stunning loose curls. It has tourmaline ceramic plates which allow you to successfully style your hair with reduced heat. However, if you need it, the heat setting on this straighter is adjustable up to 450°F!
What’s more this straightener has a handy closing hinge for simple storage or travel and is available in the prettiest shades of Peach, Pink, Purple, or Black!
Another straightener we highly recommend for curling is the Herstyler LED Pro Luxe 1.25” Black Straightener. It has a great rounded edge meaning the hair will slip through and around very easily as you curl your hair.
Not to mention their chic black design will look incredible on your dresser!
Additionally, this straightener has 1.25” wide solid ceramic plates, meaning you can curl larger sections of hair at a time if you wish to.
However, this straightener truly shines thanks to its red LED lights which are embedded in the top. middle, and center of the plates.
Why is this such a bonus?
We can explain…
Since hair follicle molecules absorb red light, these red LEDs will penetrate into the scalp and improve how your hair looks and feels.
The result? Smooth, shiny-looking hair that looks and feels amazing from root to tip!
Does Curling Your Hair With a Straightener Take a Long Time?
We’re all busy, and sometimes the thought of sitting and meticulously curling each and every section of our hair seems like it’s not worth the effort!
Luckily, once you get the hang of curling your hair with your straightener and settle on the technique that’s right for you, it’s actually pretty fast!
Like any new skill, it may take you a few tries to really get the hang of it. But once you have, you can easily work it into your busy morning routine, or do it quickly after an evening shower, ready for the following day.
Do Straightener Curls Last All Day?

Wondering if this style will even last?
We did the same thing!
After all, ‘using a straightener as a hair curler‘ sounds pretty contradictory.
Well, we’re happy to tell you that styling your hair in this way really does work, and it really does last! Our tip? Get to know your hair before you start so you can decide how you’ll section out your hair as you use your new hair curler.
In our experience, attempting to curl very large sections at a time will result in either no curl at all or a curl that drops out in a few minutes. This applies to whether you’re using either a straightener or a traditional hair curler.
So, get to know your locks. Ask yourself, how thick/fine is your hair? Do you want to curl slightly larger sections for a more laid-back look? Or, is curling smaller sections for a bouncier, more voluminous finish your ultimate goal?
Decide this before you start and you’ll walk away from your dresser with curls that’ll last all day long!
Does Curling Your Hair With Straighteners Damage Your Hair?
Any time we apply heat to our hair, we do risk causing damage. That’s why we highly recommend investing in quality heat tools and products that prevent heat damage before getting started. You’ll find this quality, along with superior design standards, in all of Herstyler’s styling tools.
What’s more, as long as you’re not clamping down too hard on your strands, or holding your straightener on your hair for too long, you shouldn’t have issues with damage.
Try to make sure each section takes you no longer than 6-8 seconds to curl.
How To Use Your Straightener as a Hair Curler
Now for the part you’ve all been waiting for, the how-to!
It’s simpler than you think and doesn’t take look to get the hang of. And you can trust us, once you have the technique down, you’ll be so glad you took the time to learn it properly.
Before You Get Started
We know you’re eager to turn up the heat and get to curling, we don’t blame you! But, before you do there are a few things you’ll want to do, and make sure you have ready.
Start With Clean, Dry Hair That’s Ready For Heat
Firstly, we recommend starting with clean, dry hair. If your hair has become a little oily since your last wash or you have a few days’ worth of product in your hair, curling will be harder to achieve.
Not to mention we don’t recommend adding heat to hair with product build-up as it can cause damage to your hair.
Additionally, if you’re hair’s not doing too good right now, we recommend giving it a little love and making sure it feels strong and healthy before applying any heat that may hurt it further.
Now, if your hair is fresh and clean, your strands will slip through the straighteners much easier. This will result in softer, more even curls. It also will help stop heat creases from forming on your curls, the last thing any of us want!
Last but not least, we strongly suggest spritzing your strands with a high-quality heat protecting spray. This will prevent damage in the short and long term. Plus, your hair will style much easier and smell amazing!
Practice, Practice, Practice.

New at this?
There’s no need to panic!
Whether you’ve never tried this curling technique before, or you have but the results were a bit of a mess, you’re certainly not alone! This can be a tricky technique to master.
However, there are certainly ways you can practice it and get your technique down before you begin.
Our top tip?
Try without heat first!
Now, practising this technique before you actually turn on the heat, of course, won’t result in any curl.
The reason we say to try with your straightener turned off, is because you can first learn, not only how to position your straightener as you curl, but also understand how your hair moves through the plates as you twist your heat tool.
This will be invaluable when you do eventually get to curling as you’ll already know just how to hold the straightener. This will avoid any slips ups, heat creases, or nasty burns!
The Curling
Now that you’re ready to go and your hair is prepared, switch on your straightener. Adjust the heat and make sure it’s not so high that it’s going to damage your locks.
If you find the curls aren’t forming because the heat is too low you can always adjust after your first curl. Best to start with a moderate temperature than a very high one.
The Technique
- Section out your hair as desired and hold the first piece ready to curl. With the cord facing down and the front of your straightener pointing forwards, clamp the straightener in a slightly diagonal position a couple of inches from the root. Immediately rotate your straightener 360 degrees away from your face.
- Once it has reached this position, (the front of your straightener has come full circle) immediately begin pulling the straighter downwards, slightly out towards the side.
- You should find this rotate and glide action becomes one fluid movement and only takes around 5-6 seconds per section
- If you find your curls aren’t forming, gradually try turning up the heat, or, take longer over pulling the straightener down and out.
Just make sure you’re not curling any section of hair for longer than 8-10 seconds or it’ll quickly become damaged. What’s more, if you have curtain bangs or shorter pieces at the front, leave them until last and don’t take too long over them. The last thing we want is a frazzled fringe!
Repeat this process for every section of your hair, and you’re done! It’s as simple as that.
Pro tip!
Want those curls to be tighter and last even longer?
Go ahead and hold the curl, in formation, in the palm of your hand, then, press it to your scalp. Just make sure it’s not too hot before you do!
Holding each curl there until it cools slightly, or even simply wrapping it around your finger after each curl will result in longer-lasting, more formed curls.
Perfect for events or work engagement where you’re looking to be a little more formal with your style.

For More Volume…
If you’re hoping for voluminous, bouncy curls that don’t combine with one another throughout the day, (this can happen with lots of curls that all curl the same way) try alternating how you hold your straightener.
Curl your first section of hair outward, curl the second section inward.
It’s the same motion as you’re used to, you’re simply turning the straightener 360 degrees toward your face, instead of away from it.
Continue alternating like that throughout and instead of bunching together, these curls will bounce off of one another, keeping the volume!
For Straighter Ends…
If the very reason you wanted to learn this technique was to finally achieve those dreamy beachy waves you see all over Instagram, we’re with you.
It’s a stunning look and since dipping in and out of the ocean every morning isn’t an option for most of us, this is the way to go!
One of the defining and most beautiful qualities of this look is how the ends of the hair seem to naturally straighten out at the end of each curl.
To achieve this, don’t curl all of your hair then go back in a straighten out the ends. This will look unnatural and overworked.
Instead, as you’re curling the hair and reach the point where you want the straight end to start, simply release the section of hair from the straightener.
This stops the hair from curling all the way down and will give you the natural-looking straight ends you’ve been dreaming of.
And that’s it! A simple new way to quickly curl your hair that means you need only invest in one heat tool. Beautiful, cost-effective, and (we’re betting) easier than you ever thought!


