


Beachy waves may look naturally effortless but, for most people, this style requires a little time and attention.
Fortunately, when it comes to creating beachy waves, you have a few options. The versatility of this hairstyle means that it can be crafted with just about every heated styling tool available, so long as you utilize the right technique.
Ready to get started? Read on as HerStyler talks you through a few different methods for creating beautifully textured beachy waves.
The Prep Work
 Whether you plan on using a flat iron, a curling iron, or even no heat at all, it’s always easier to create beachy waves on hair that looks and feels soft and healthy.
This starts with using a good shampoo and conditioner. Look for a moisturizing shampoo, such as the HerStyler Hemp Shampoo. It’s brimming with hemp seed oil, an ingredient loved for its hydrating capabilities. Pair this with our Rosehip & Sage Conditioner and your hair will immediately feel smoother and so much more manageable.
Before drying your hair, run a hair serum through your damp locks. Not only will this help to prevent the appearance of heat damage if you intend on using a heated styling tool, but it will also make your hair feel softer and easier to style.
Then, if you plan on using a heated styling tool, blow dry your hair so that it’s smooth and tangle-free. Our go-to for doing this is the HerStyler LED Pro Luxe Dryer. It makes use of red LED technology and negative ion technology, both of which contribute to hair that looks strong, glossy, and healthy. You can leave your hair to air dry too if you’re trying to cut back on heat exposure. However, make sure that it is 100% dry before you begin heat styling.
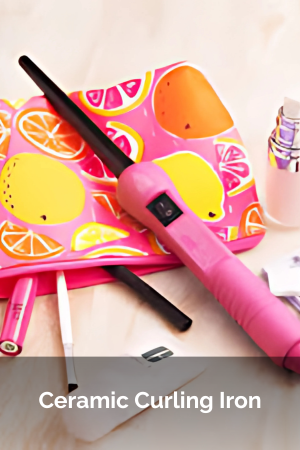
Creating Beachy Waves With a Curling Wand
 The most obvious tool to use for creating beachy waves is a curling wand. After all, waves are a type of curl!
Ideally, you should use a curling wand with a smaller barrel. However, if you don’t mind larger and looser beachy waves, then a larger barrel would work too!
To start with, you’ll need to split your hair into several sections. Then, tie away the sections that you aren’t going to be working on right away. This will save them from getting caught up in the section of hair that you are going to be curling.
Wrap one section of your hair around your curling wand. Keep it quite loose since beachy waves are soft and light, rather than tight and coiled. Avoid wrapping the last few inches of your hair. Leaving these as they are will give your beachy waves some extra texture and a more natural finish.
Keep your hair held against the curler for a few seconds before releasing and moving onto the next section. As you work your way to the top of your head, lift your curling iron as you wrap your strands around the barrel. This will help to give your finished look more body and movement.
Once you’re done, run a hair serum through your locks. The HerStyler Marula Hair Nourishing Serum is great for this as it leaves the hair feeling so smooth and silky while also reducing the look of frizz.
Choosing a Curling Wand for Creating Beachy Waves
 Wondering how to pick the perfect curling wand for creating beachy waves?
As mentioned, smaller barrels work best. Even if you have thick or long hair, you’ll still be able to twirl through your locks in no time, so long as you split your hair into enough sections.
HerStyler’s Rose Gold Titanium 3P Curler is always a good choice because of how it comes with three barrels. You’ll be able to choose between 9/18mm, 18/25mm, and 25/25mm. Since all of the barrels are tapered, they’re ideal for creating beachy waves that look naturally textured.
What makes this curling wand even better is how it offers two temperature settings, with the highest reaching 400°F. This makes it suitable for all hair types. If your hair is thick or coarse, go with the maximum setting. However, if you have thin or fine hair, you’ll be able to dial the curling wand down to its lower temperature setting – you won’t need such a high heat to set your waves. This will help to reduce the appearance of heat damage.
Creating Beachy Waves With a Flat Iron
 If a hair straightener is usually your tool of choice, then you’ll be happy to know that this can also be used to create gorgeous beachy waves. In fact, a flat iron can often be the best tool to use for this style. Unlike a curling wand, which can sometimes create waves that are a little too rounded and perfect, a flat iron will allow you to form S-shaped waves that look so much more beachy.
Just like when using a curling wand, start by separating your hair into sections. The size of your sections will determine the density of your waves. The more sections you have, the more waves you’ll end up with, so try to keep your sections mid-sized.
Then, choose a section to start with and position your flat iron a few inches below your scalp. Once your hair is between your straightener’s plates, partially twist the flat iron so that your hair wraps around a section of it. It shouldn’t wrap around fully, as you want waves rather than tight curls.
Which direction you twist your straightener in is completely up to you. This will influence the direction of your curl. For a more textured finish, alternate the direction you twist in so that some sections of hair curl forward while others curl backward.
Holding your flat iron in your chosen position, slowly glide it down the length of your hair, releasing it a couple of inches up from the ends. Once you’re done, move on to the next section of your hair.
When you’ve finished, run your fingers through your locks a few times. This will help to blend each of your sections together while also separating your waves. As you’re doing so, it would also be a good idea to run a hair serum through your lengths. The VitaOil Biotin Hair Serum from HerStyler is ideal for daytime use as it will help to keep your strands feeling protected from environmental damage.
Choosing a Flat Iron for Creating Beachy Waves
 Wondering if your flat iron is suitable for creating beachy waves?
Ideally, you should be using a straightener with curved, rather than straight, edges. This will enable your hair to bend and curve around the body of the flat iron. If you use one with straight edges instead, your waves could end up having quite harsh angles in them.
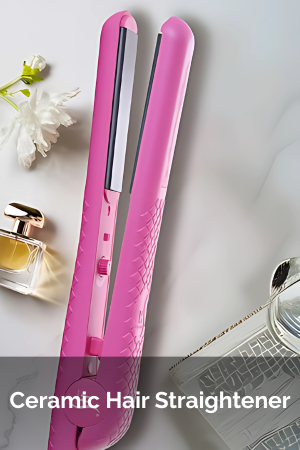
If your current hair straightener isn’t suitable for creating beachy waves, consider the Colorful Seasons straighteners from HerStyler. Not only do the models in this range come in a snazzy selection of colors, but they’re also extremely versatile. You can straighten, curl, and flip with these multi-tasking tools, enabling you to create hundreds of different looks.
With ceramic plates, you won’t have to worry about causing too much damage to your locks while you’re working on them. This is helped by the infrared technology fitted into this flat iron. It distributes the heat in an even more balanced way, cutting back on surface damage. Thanks to its adjustable temperature control, you’ll be able to choose a heat setting that’s perfect for your locks too. You won’t need to subject your hair to more heat than it actually needs.
Creating Beachy Waves With Overnight Braids
Is it possible to create beachy waves without the use of a heated styling tool?
Most definitely! Even better, there are a few different ways of doing so, with the most popular being overnight braids.
This one is pretty self-explanatory. Tie your hair into braids overnight and then release them in the morning – your hair will look beautifully wavy!
However, there are a few things to know in order to pull this off successfully…
Firstly, your hair shouldn’t be too wet when you create your braids. A small amount of moisture helps, but make sure that this is very small! Ideally, your hair should be almost-dry before you get started. This will help to prevent your hair from snapping as you braid it, while also ensuring smoother-looking waves in the end.
When creating your braids, start braiding your hair a few inches down from the top of your head. Then, when tying them off at the bottom, use hair ties that are strong enough to secure each braid but not so tight that they’ll leave an indentation when you come to remove your braids in the morning.
To prevent your hair from looking frizzy in the morning, sleep on a silk or satin pillowcase. Both materials reduce the amount of friction that’s created when your hair rubs against your pillow while you sleep. That friction contributes to frizz, so doing away with it will leave your locks looking so much smoother.
Using Space Buns Instead of Braids
If you don’t like sleeping with braids in, then space buns are another option. They’re tied at the top of the head, so won’t get in your way while you sleep. You’ll need between two to four, depending on how thick your hair is and how wavy you want the finished outcome to be.
Position your space buns evenly across your head and tie them tightly. Then, in the morning, release them and enjoy your new beachy waves! As always, applying a hair serum or a hair spray to your locks at this stage will help to set your style. It’s a great way to make sure that your waves last all day!
Summary
Now that you know the secrets behind creating perfect beachy waves, there’s nothing stopping you from rocking some tousled and textured curls of your own. Whether you usually use a curling wand, a flat iron, or go old school with a heat-free method, experiment with all of the different techniques above to find the one that best suits your hair.
Click here to shop for more bestselling styling tools and hair care products from HerStyler.


